King Gates Genuine Wireless Keypad
Out of stock
King Gates
Download Instructions
Instructional Video
King Gates Wireless Keypad
For compatible remotes for this keypad please Click Here
How to use the unit
- Key-in your security code followed by the Letters A, or B, or C.
- 6 seconds allowed between each press of a button.
- Beep confirmation will be heard - see the table below.
BEEP MEANING SIGNALS
- 1 short beep - Confirms a key press.
- 1 long beep more than 6 seconds - try again form the beginning.
- 3 long beeps for code programing - Code have been successfully changed
- With regular use - Battery low -replace the battery, you will hear the beeps with the new battery stalled correctly
- 5 short beeps - something went wrong, try again
- Series of beeps over 2 sec - the batteries are exhausted and must be replaced
Maintenance
This unit does not require any special maintenance. Check it occasionally for spiderwebs, dust. wipe and clean wet cloth
Technical Specifications
- Operating Frequency: 433.92 MHz, compatible with all King Gates motors.
- Transmission Range: Effective up to 30 meters.
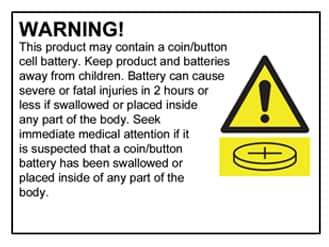
- Battery: 2 x CR2430 lithium batteries (included), providing up to 24 months of life based on moderate usage (10 operations per day).
- Number of Programmable Codes: 3 (A, B, C), with 1 to 8 digits per code.
- Weather Resistance: IP54-rated for outdoor use, ensuring protection against dust and water splashes.
- Operating Temperature: -20°C to +55°C, suitable for diverse climates.
- Dimensions: Compact design measuring 128 mm x 81 mm x 44 mm, allowing for easy mounting.
- Backlit Keypad: Illuminated for clear visibility in low-light conditions, ideal for nighttime use.
Replacing the battery (see figure on net page)
- Replace the battery every about 12 month, or when it dead. Please recycle the battery
- Remove the two screws at the bottom of the unit €“ Fig. A
- Extract out the buttons plastic part form the metal case €“ Fig. B
- Unscrew the battery cover with a coin and replace the battery
- Pay attention to the battery cover seal
- The positive poles (+) is facing you -Fig. 6
- Put new battery and close back the battery cover, screw with the coin- Fig.6
- Fit the plastic button unit back to the metal case €“ Fig. 7
- Screw the two bottom screws -Fig.8
Programming new security codes notes
WARNING !
- Losing a code, or mistake with the codes, will totally damage the unit.
- The manufacturer warranty does not cover for loss, or mistakes with codes.
- Read and follow the instructions. If you are not sure, ask a technician to assist.
- Claim of incorrect factory default codes will not be covered by warranty.
- Check the default codes before doing the programming, read this instruction manual fully and make sure that you understand it.
Installation of the unit
- Before installation check reception form the desired installation location
- Choose a flat surface for installation, chose the right high tot be comfort for adult and or children users
- Extract out the button plastic part form the metal case - Fig. 2
- Punch holes in the metal case for the screws to fit it to the wall/ post
- Fit the metal case of the unit to the wall / post with screws - Fig. 5
- Put the rectangle black rubber par to its place - Fig. 4
- Install the unit in the correct directions so the numbers and letters are facing up correctly- Fig. 5
- Fit the buttons part back to the case of the unit - Fig. 7
- Screw in the two screws at the bottom - Fig. 8
| Battery Type: | Battery type TBA |
| Battery Access Type: | Tool Required |
| AS62368.1 Compliant: | Compliance TBA |
| Battery Included: | Yes |
| Contains Coin Battery: | Coin Battery TBA |


